WebP versus JPG, which is better?
Some higher detailed images are better off with being stored and shared as JPG. I explain why and explain why it makes sense to use Squoosh to visualize differences when saving to WebP or JPG.
While WebP is generally considered a superior image format due to its smaller file size and better compression compared to JPEG, there are still some cases where JPEG may be the better choice.
Here are a few scenarios where JPEG may be preferred over WebP:
- Compatibility: While most modern browsers support WebP, there may be some older browsers or devices that do not support the format. In such cases, it may be necessary to use JPEG to ensure that all users can view the images.
- Complexity: WebP can offer better compression and smaller file sizes, but this also means that the compression process can be more complex and resource-intensive. In cases where time or computing resources are limited, JPEG may be a more practical choice.
- Quality: While WebP can offer comparable or better quality than JPEG at smaller file sizes, there may be some cases where JPEG is still able to achieve higher quality at a given file size. This may be particularly true for images with complex or fine details, where the lossy compression used by WebP may result in noticeable artifacts or blurring.
Overall, while WebP is generally the preferred format for web images due to its better compression and smaller file sizes, JPEG can still be a viable option in certain cases where compatibility, complexity, or quality considerations are a factor.
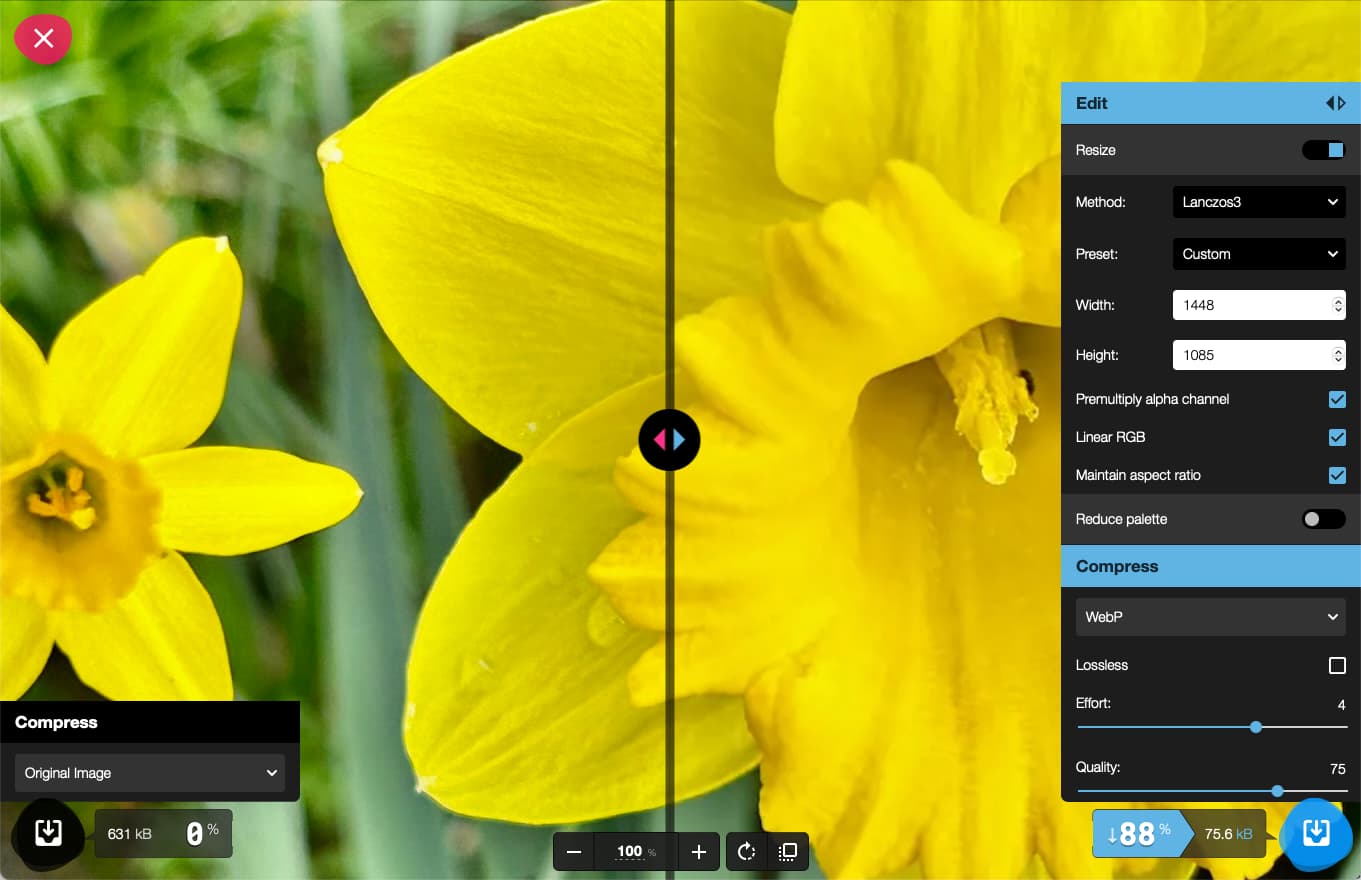
The right tool is called Squoosh
When optimizing images, it's important to strike a balance between file size and image quality. While reducing file size can help improve website performance and reduce load times, it's also important to ensure that images are still visually appealing and don't appear too compressed or pixelated.
This is where the slider function in Squoosh can be especially useful. When optimizing an image in Squoosh, you can use the slider to adjust the quality of the image and see the effects of the compression in real-time. As you adjust the slider, the image will update to show the changes in quality, making it easy to find the optimal balance between file size and image quality.
The slider function in Squoosh is especially useful because it allows you to test the image quality at different compression levels without needing to save and re-upload the image each time. This can save a lot of time and make it easier to find the optimal compression level for each image.
Check out my article on Squoosh here.